The End-to-End Testing (e2e) suite utilizes Cypress, an open source end-to-end testing framework. It runs tests against a locally hosted instance of Submitty by automating a browser. Tests are written in JavaScript and are executed in the Cypress test-runner. This does not test the PHP (or C++) code directly, but rather focuses on user navigation through the website. It used to use Selenium, but has been rewritten in using Cypress.
Installation
Make sure you have node.js version 10 or higher installed locally. You can check using the command: node -v
# from the site directory
npm install
If you are on Linux, view this page to see what dependencies you may need to install additionally for Cypress.
If you are on WSL and run into an error, make sure you installed node.js on your desktop (Program Files) and not inside your local Submitty repository.
Note: If you encounter issues launching Cypress, run npm update from the site directory.
Cypress Test Runner
You can open the test runner by navigating into site/ and using the command:
# from the site directory
npx cypress open
Once Cypress opens, select the “E2E Testing” on the left and then select a local browser to test against.
Note: On startup Cypress will try and check if the site is running on the http://localhost:1511 address, make sure you have a local instance of Submitty that is running while testing with Cypress.
Running Tests
From the test runner you should see a list of spec files, selecting one will run the tests defined in that file.
See an overview of the Cypress application here
Once the tests have been run you can interact with the site on the right hand side of the runner. This is a good way of debugging what state the site is in if a test fails. You can also right click and see the console for any errors or information. During this time you’re terminal should have a list of HTTP responses the site has been sending to your browser. For example:
Example Requests
HEAD / - - ms - -
HEAD / - - ms - -
HEAD / - - ms - -
POST /authentication/check_login?old=http%253A%252F%252Flocalhost%253A1511%252Fhome 302 287.491 ms - 96
GET /home 200 287.217 ms - -
GET /authentication/login 200 2.297 ms - -
POST /authentication/check_login?old=http%253A%252F%252Flocalhost%253A1511%252Fhome 302 2772.070 ms - 96
GET /home 302 210.507 ms - 210
GET /authentication/login?old=http%3A%2F%2Flocalhost%3A1511%2Fhome 200 264.544 ms - -
GET /authentication/login 200 1.629 ms - -
POST /authentication/check_login?old=http%253A%252F%252Flocalhost%253A1511%252Fhome 302 205.710 ms - 96
Running Headless
You can run the entire test suite in headless mode. This will pipe the browser display directly to Cypress without getting displayed and is faster than the test-runner. This can be done with the command:
# from the site directory
npx cypress run
If any test fails a screen shot will be taken of the step that failed. Additionally, a video will be recorded each time of the run. They can be found under the site/cypress/screenshots and site/cypress/videos directories.
Writing Tests
Test files are written under the site/cypress/e2e and should follow the format *.spec.js*. You can
create folders as needed to organize groups of tests together.
Cypress test suite structure:
Here is a quick overview of the file structure on Submitty.
For a more details see the Cypress docs here
cypress.config.ts
cypress/
├── fixtures
│   └── example.json
├── e2e
│   └── ...
│
├── plugins
│   └── index.js
├── screenshots
│
├── support
│   ├── commands.js
│   └── index.js
└── videos
While the main test files are in the integration directory, there are some supporting files. The fixtures directory contains files used to mock data. This can be text files, JSON, images, etc.
The commands.js file allow you to program Cypress commands. Actions that require multiple steps and might be done often can be grouped together under a single command to prevent repetition, for example the action of logging into the Submitty site is a command. You can also write plain JavaScript functions in this file and import them using ES6 module syntax.
The support/index.js file instructs Cypress which files to include with every test, you most likely won’t need to touch this file.
The plugins/index.js allows you to extend Cypress’s default behavior. You can read more about them here.
The top level cypress.config.ts is the global configuration used.
Test Structure
Cypress has adopted Mocha’s behavior-driven development (BDD) syntax to organize tests.
You will typically use describes or context to organize tests. These blocks organize tests into groups, either or can be used they both act the same. it denotes an actual test case and contains your test logic.
To test assertions, you will use the integrated Chai tool to write your assertions. Here, you will use the expect() function wrapped around an object, and use a series of assertions about it.
Here is an example:
describe('foo', () => {
	context('bar', () => {
		it('baz', () => {
			expect(true).to.equal(true);
		});
	});
});
This will organize the test “baz” under the folders “foo” and “bar” when viewing the test in the runner, for organzing files with a large amount of tests this can be useful.
You can also use the afterEach and beforeEach function calls to perform setup and teardown for each test.
Be sure to read Cypress’s best-practices for using these functions here.
Workflow
A test will typically:
- Navigate to a page
- Find an element
- Interact with it
- Make an assertion
This translates to cypress functions in the form of:
cy.visit('/your_page/')cy.get('your_element')- Interaction
- Assertions
Cypress allows you to select elements through JQuery Selectors.
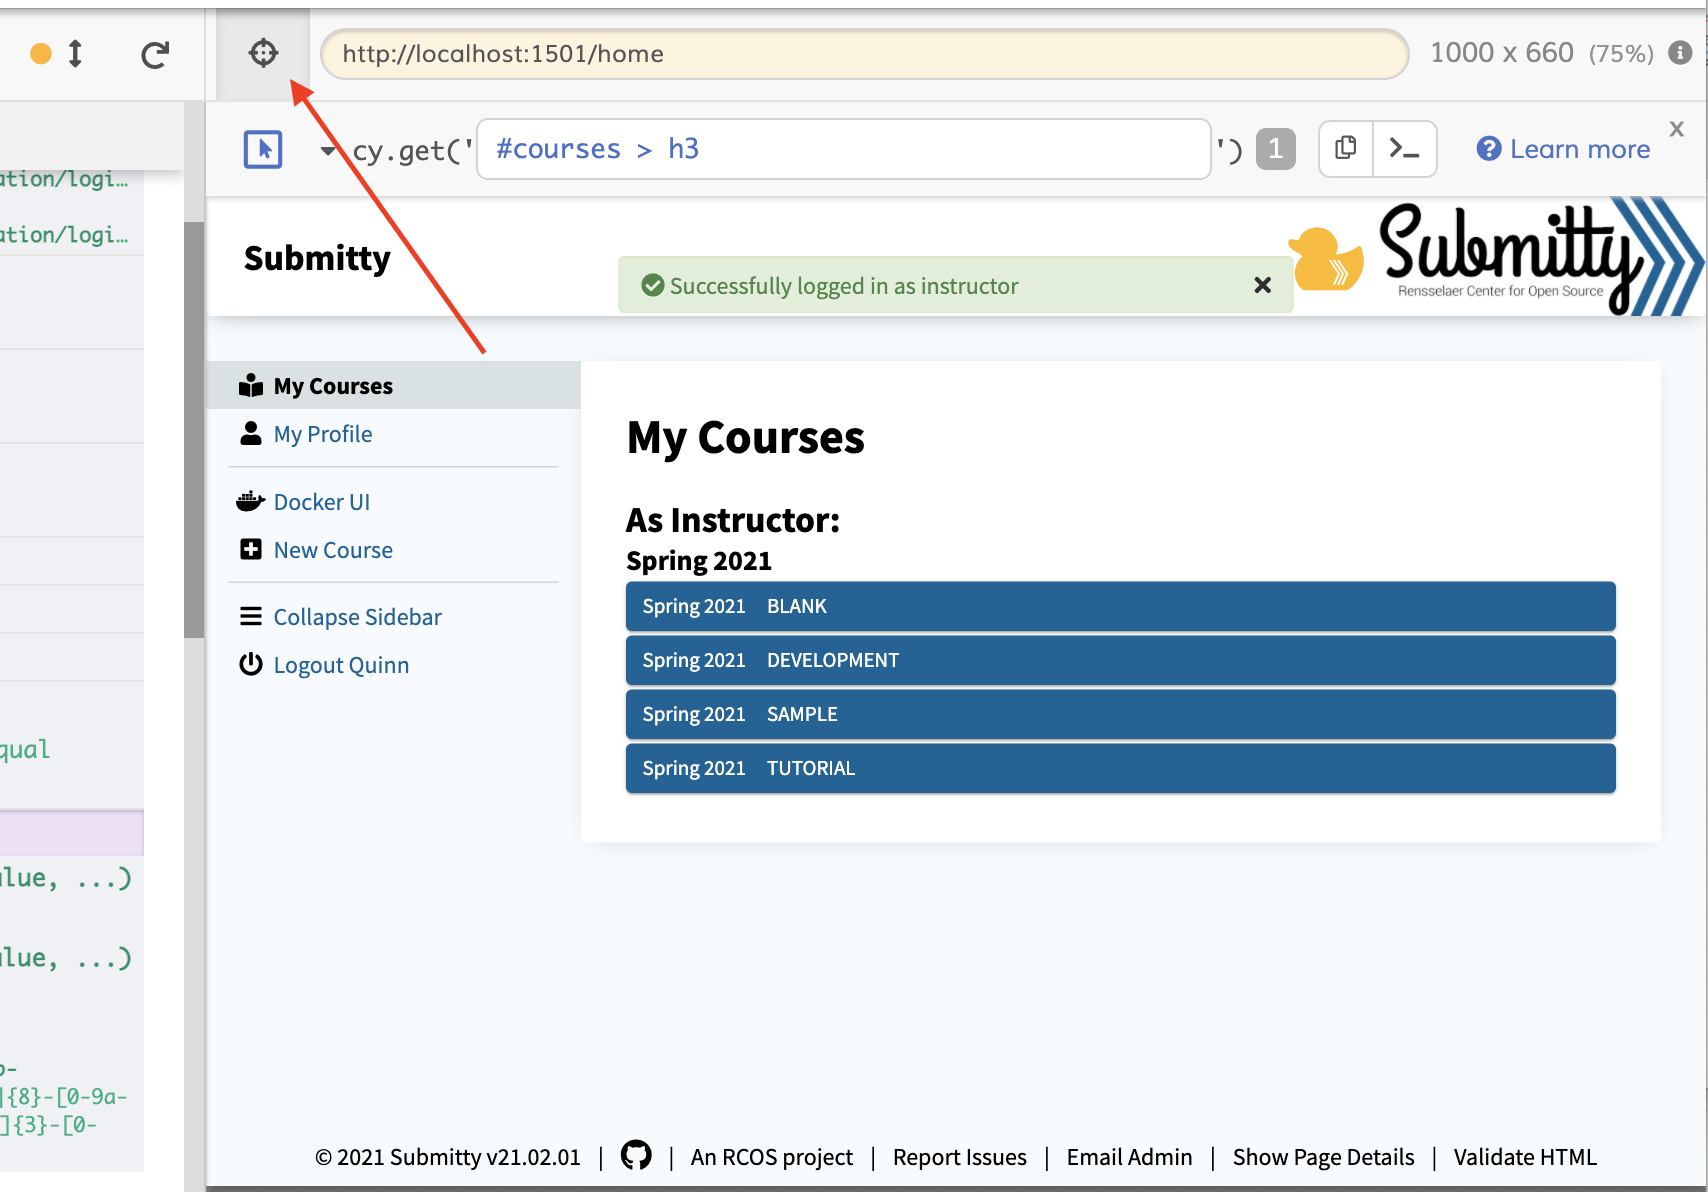
You can also use the “selector playground” in the test runner which allows you to highlight part of the screen and let Cypress generate a selector for you. Note: for deeply nested HTML elements you will most likely have to create the selector yourself.
You can then use the cy.get() function to attempt to find an element on the page. If your test only requires an element to exist on the page, using a cy.get() is a strong enough check.
If an element is not immediately ready Cypress will automatically retry for 4000ms by default, this can be useful for elements that dynamically render or preventing flakiness.
NOTE
Most Cypress functions are asynchronous and yield a result instead of returning it, this requires you to chain together actions.
cy.get('my_element')
.then((result) => {
	//do something with the element we found
});
This prevents code from being executed if a previous part of the chain fails, see more about it here
Debugging
You can perform print debugging using console.log and view the results in the console just like a normal browser.
When a test is finished running you can see every step and visit a dom-snapshot of what Cypress did. If you click on a step, information about it is dumped to the console.
Cypress CI
The Cypress test suite will also be running your tests on GitHub actions. There are some differences between the vagrant instance and the GitHub actions instance. Most notably, only the sample course is built (without submissions). It is also a fresh instance so any state you might of created on your local instance may not necessarily exist, you should always design your tests to work against a fresh instance.
If your test fails, GitHub will upload the Cypress recording and screenshot(s) of what failed under the “artifacts” section of the GitHub actions results.