Submitty supports instructor upload of bulk (multiple students) scanned PDF files to then be divided into individual assignment PDFs and assigned to students.
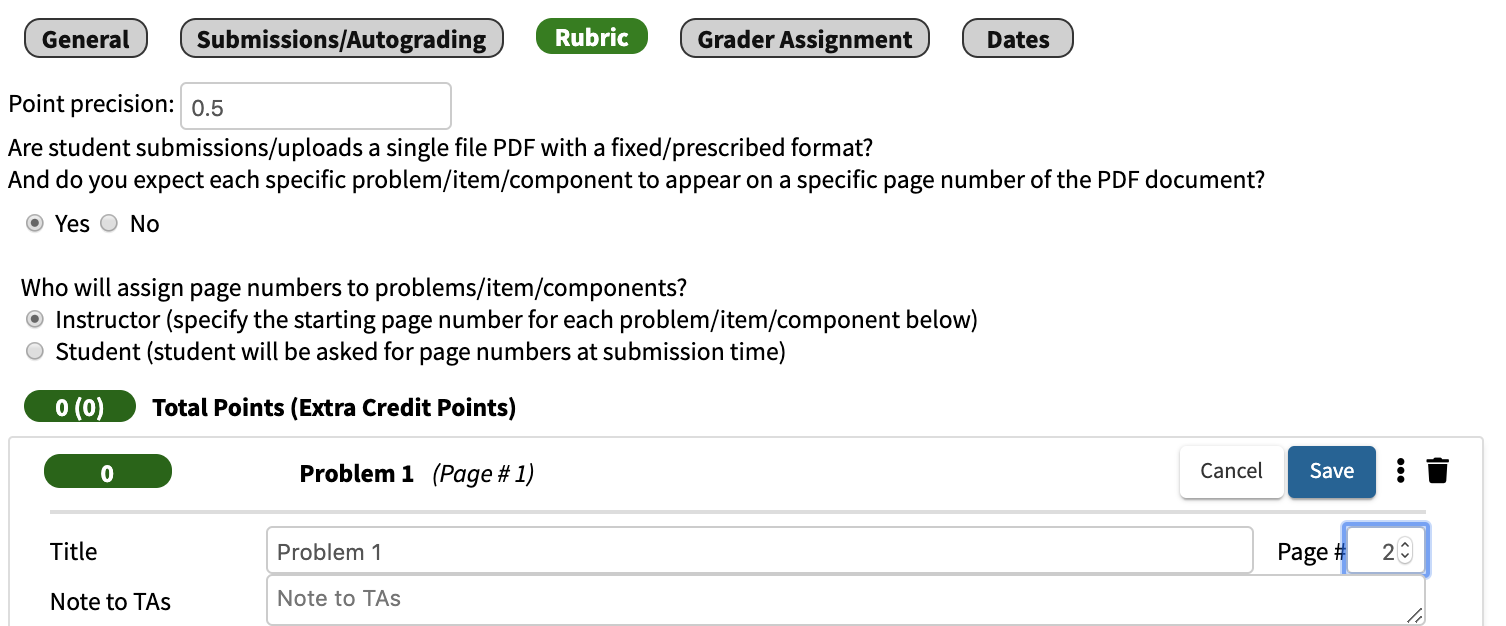
If there is TA/manual grading, rubric questions can also be assigned page numbers by either instructor or student. In the TA grading interface, clicking on a question will open the corresponding page in the PDF.
To support anonymized manual grading, the instructor can also specify that portions of one or more pages of each individual student PDF containing the students name or other identifying information be redacted from view by the graders.
Preparing the Exams for Scanning
-
If you notice a student has extra pages or missing pages, or the exam is rather crumpled, set them to the side for individual scanning at the end.
-
Scanning ~100-150 pages at a time works well, so for example if your exam is 14 pages (7 sheets of paper, front & back), separating the paper exams into stacks of 7-10 works well.
-
Make most stacks the exact same count, and make sure the person working the scanner knows how many pages to expect per pack (e.g. 98 pages or 140 pages). The scanner person should check the page count after each scan and try to catch problems early.
-
Use scissors to cut the staple corner off the exams. IMPORTANT: Carefully cut off the smallest amount of paper with the staple. If you cut too much, the scanner feeder might fail to load the sheets of paper. Tap the exam papers on a table to align the sheets and make it less likely to jam or crumble in the feeder when scanning.
-
Put a post-it note on the cover of the first exam of each page (remove the post-it for the actual scan), and give a letter/name to each exam pile. Have that name match the scanned file name (either change the file name or write the scanner-generated name on the postit after scanning). This will help tracking down the pile if it needs to be re-scanned because of stuck pages or scan quality settings.
-
Optional: Re-staple the exams after scanning. Note: This is less necessary if you’ve pre-printed exams with each students name on every page.
Tips for Scanning
Explore the options / settings on your scanner. Things to check:
-
150-300 dpi works well for most exams (300 dpi might be necessary for students with small cramped handwriting).
-
Choose gray scale scanning (not black & white).
-
You may want to adjust the brightness / contrast to be sure to pick up light handwriting.
-
Choose duplex mode (double sided scanning). Even if your exam is single sided, the students might write on the back.
-
Specify “Do not rotate”. Some scanners will attempt to detect rotated pages and make errors rather than correct actual rotated pages.
-
Make sure “Blank page removal” is not selected. This will only throw off the page count!
-
Choose a new directory to save your scans. Scans should hopefully be sequentially numbered, or named with the timestamp to facilitate orderly upload to Submitty.
Scanning with the ScanSnap from Ricoh
The Ricoh ScanSnap portable scanner is affordable, convenient, fast, and robust. We have used models from iX500 to iX1600 – the software and interface is similar through different model numbers.
ScanSnap Settings on Windows
Here’s how to set our recommended scanner confiurations using the Windows ScanSnap software.
-
Plug the scanner into your laptop using a USB connection.
-
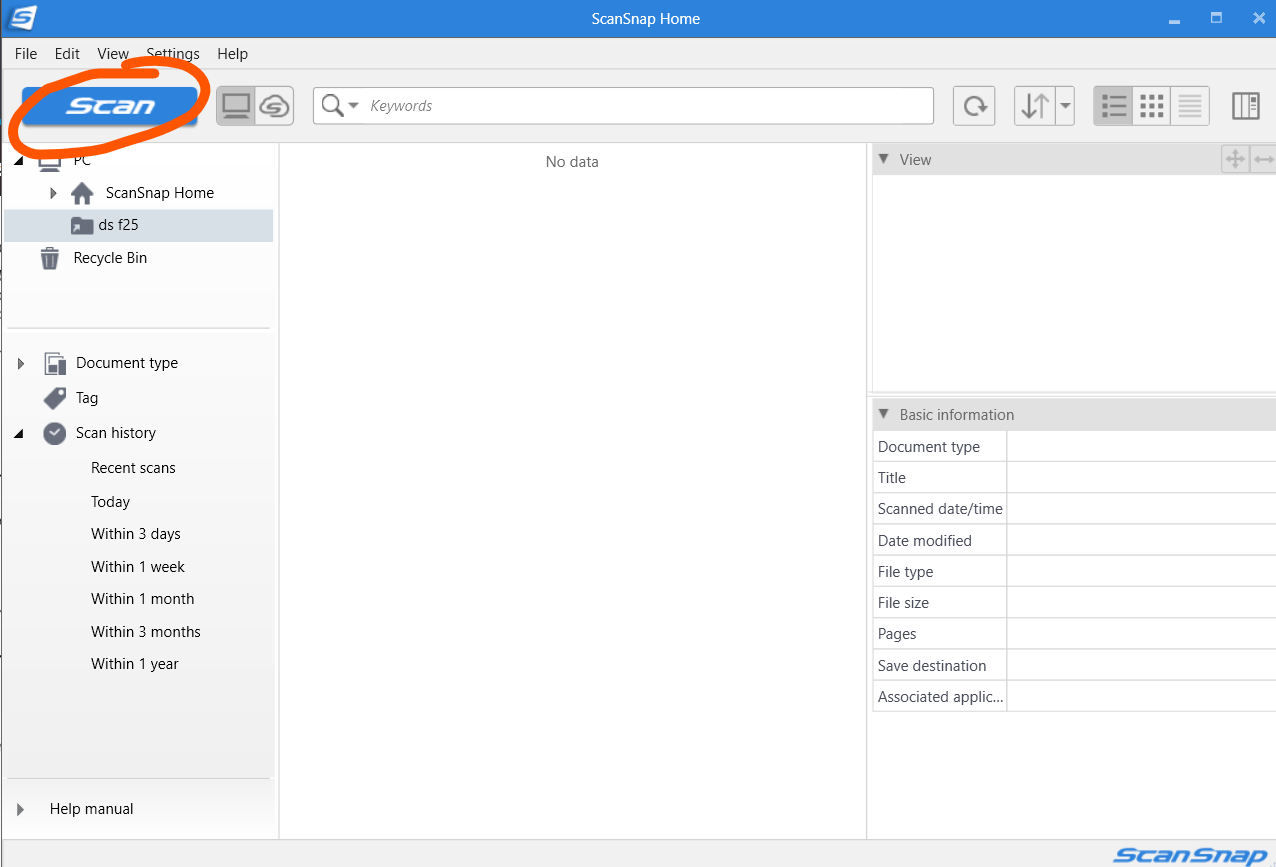
Open the ScanSnap the scanner. And press the “Scan” button in the top left corner.
-
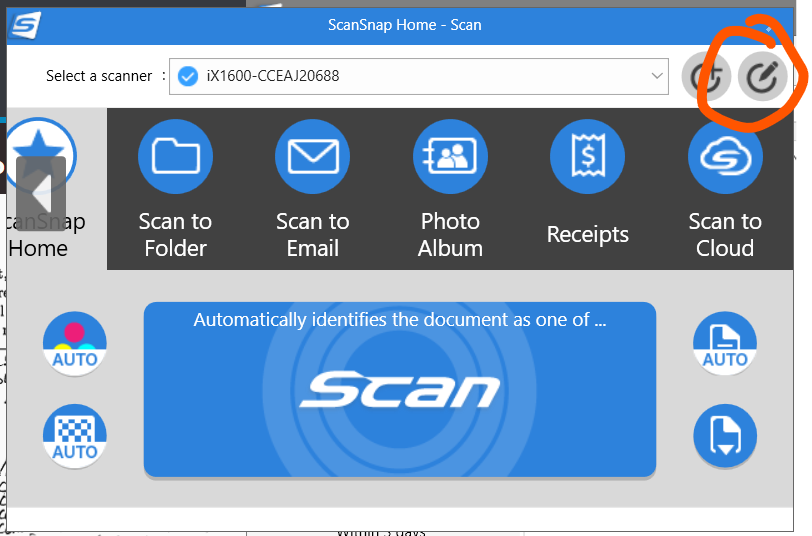
Now edit your profile by selecting the small pencil icon in the upper right corner.
-
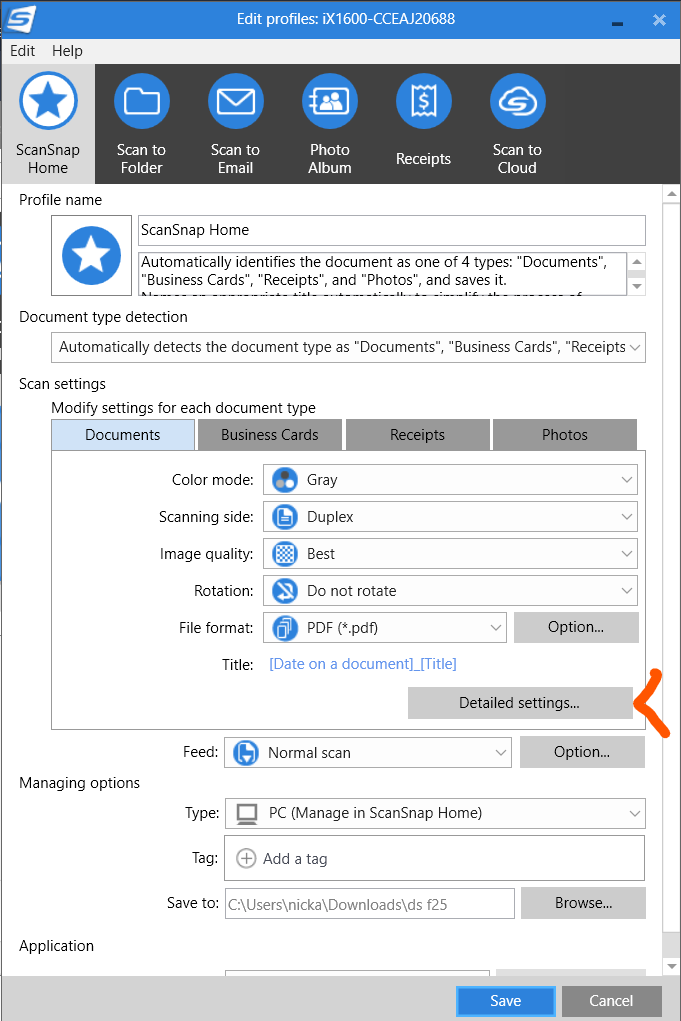
Halfway down the page is an option for “Detailed Setttings”, click that.
-
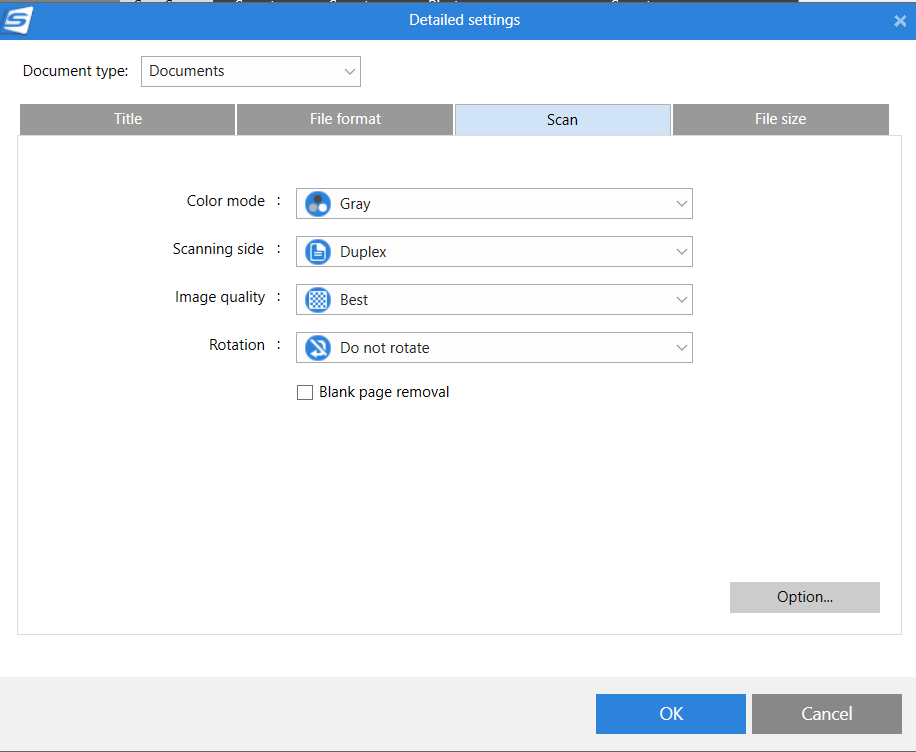
On the detailed settings page you can select
-
“Greyscale” – It is important not to chose “Black & White” as this will clamp all pixels to pure white or black and lightly written pencil marks often become illegible. Only choose “Color” scanning if your exam actually requires grading in full color.
-
“Duplex” – this will scan both the front and back of each page. Even if you printed your exam single-sided, students may have written answers on the backside of one or more pages. We recommend scanning both sides.
-
“Best” – you’ll want to scan at a reasonably high resolution to capture students who write rather small.
-
Turn on “Do not Rotate” – the software will attempt to detect rotated pages and rotate the page 180 degrees, but it seems to have many false positive detections. We recommend turning this setting off, and just being more careful when loading the paper into the scanner.
-
Turn off “Blank Page Removal” – the software will also attempt to detect and remove pages with very little data. This option is also inconsistent, and can leave you with different numbers of scanned pages per student, which will break assumptions about specific exam problems being on specific page numbers.
-
ScanSnap Settings on Linux
For Linux, we use the SANE software out of the box; a variety of of front-ends for SANE exist that work well with this scanner. Simple-scan works fairly well - you will need to make sure to select the scanner in its preferences and set it to scan ‘Both’ sides of each page; you can then ‘scan all pages from feeder’ and then export multiple exams into one PDF, for bulk uploading.
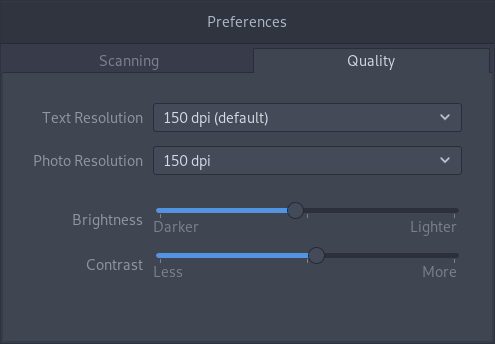
Scanning with 150DPI with the photo setting generates reasonably sized files - most PDFs generated are between 25 and 35MB for 140 pages.
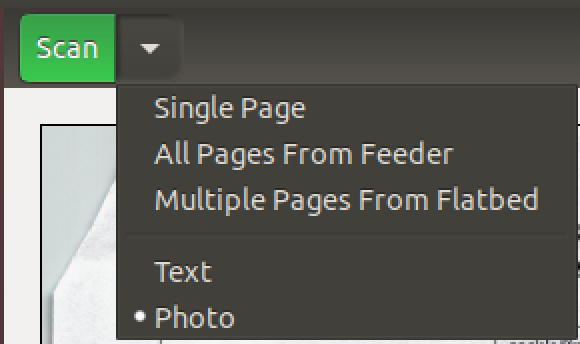
Make sure you select ‘Photo’ from the Scan settings dropown in the top left corner:
And in the preferences menu, under Quality, select 150 dpi and adjust the brightness and contrast:
Check the quality and brightness/contrast of your initial scan. The background of white paper should scan light grey to ensure you pick up light pencil marks and erased writing. Make sure that the output pixel values are true greyscale. If your pixels are clamped to black and white or clamped to a few shades of grey you will likely struggle to read the full range of pencil markings.
Additionally, simple-scan dumps a lot of autosaved files into
~/.cache/simple-scan/ (roughly 6.5GB of temporary files were
generated in one night, with about 650MB of outputted files). This
balloons pretty quickly and required clearing that out every few times
a PDF was exported.
Creating the New Gradeable for Bulk PDF Upload
Click “New Gradeable” from the left sidebar and fill out the form. Be sure to select the Gradeable Type: “TA/Instructor will (bulk) upload scanned .pdf for online manual grading”.

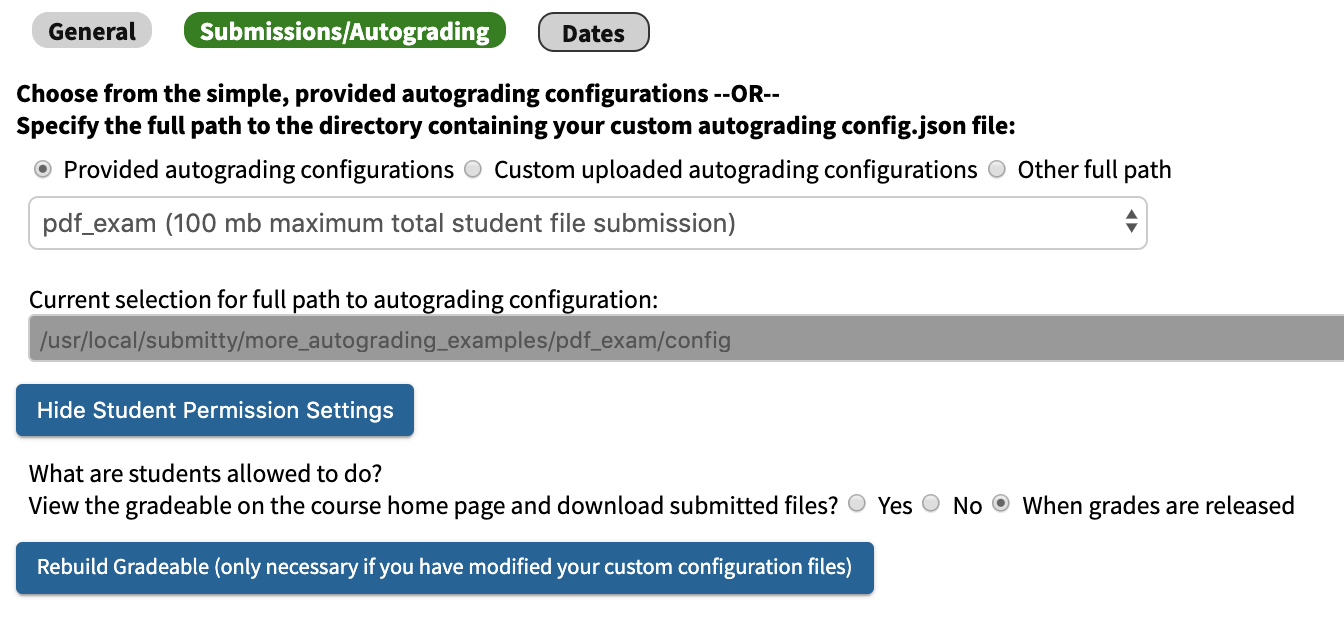
This gradeable is associated by default with the provided pdf_exam
configuration, which will allow you to upload batches of exams with
file size totaling up to 100 mb.
Note: You may need to ask your system admin to increase the Ubuntu/Apache/php-fpm default upload limit for the server.
By default, the uploaded scanned pdf will be visible to students (and downloadable) when the scores from manual grading are released. You can modify this setting from the “Submissions/Autograding” tab.
Manual Rubric Preparation and Page Correspondence
You will presumably be grading this assignment manually – by TA or instructor. If the assignment is formatted with problems on specific pages, you can assign those pages as you prepare the manual rubric. Then, when the grader clicks to open a specific component of the rubric, the students pdf file will be scrolled to that page.
Note: Alternately, if the student controls the layout of problems to pages within the document, you can request that they specify the page assignment when they upload the file.
Bulk PDF Upload
On the gradeable submission page, the instructor has three options: Normal Submission, Make Submission for a Student, and Bulk Upload. For uploading bulk PDFs for exams/quizzes/assignments, select Bulk Upload.
The default bulk upload does not expect a QR code on the cover page of each exam. Instead you will specify the length of each students exam in number of pages, for example, 10 pages. We’ll expect each bulk .pdf you upload to be a multiple of this number.

In the drag and drop box, upload the bulk exam PDF. You may submit more than one PDF at once, but the box’s maximum total size is 100Mb (see note above about the Ubuntu/Apache/php-fpm limits).
Filenames should not contain characters such as (‘ , “ , < , > , \ ) or spaces.
On submit, the bulk PDF is uploaded to the course’s
/uploads/bulk_pdf/gradeable_id folder and the split PDF items to
/uploads/split_pdf/gradeable_id folder.
After the page reloads, another section on the page will appear called “Unassigned PDF Uploads”.
Associating PDFs with Students in your Course
The “Unassigned PDF Uploads” section contains all items within the
/uploads/split_pdf/gradeable_id folder.
PDF preview contains the first page of the pdf. If you want to view the full PDF, click on the popout icon. To submit for a student, enter their user ID and press enter or click submit. Autofill for user ID brings up students who do not yet have any submissions for this gradeable.
Once submitted, the split PDF item is moved from
/uploads/split_pdf/gradeable_id to its corresponding location in the
/submissions/gradeable_id/user_id folder.
Automatic Association of PDFs using Customized Exams with QR Codes
Alternatively, if you have included a QR code on the coversheet of every exam packet, the system can separate or split your large bulk .pdf upload on the QR codes, and use the data from the QR code to help associate the individual pdfs with students in your class.

The system will decode the QR code to a string, e.g., smithj. We
expect that string to be the user_id of a student in the course.
If the string contains a prefix and or a suffix in addition to the
user_id, you should specify those strings. For example, you may
choose to use QR codes of the pattern csci1000_smithj and then would
specific csci1000 as the prefix and leave the suffix blank.
If you are using a URL in your QR code, the prefix and suffix boxes
can remove URL components, for example
https://myuniversity.edu/csci1000/student123/image.png will result
in student123 if the prefix is https://myuniversity.edu/csci1000/
and the suffix is /image.png.
Note: the prefix substring must exactly match with a substring at the beginning of the QR string and the suffix must match a substring from the end, otherwise they will not be removed from the QR string.
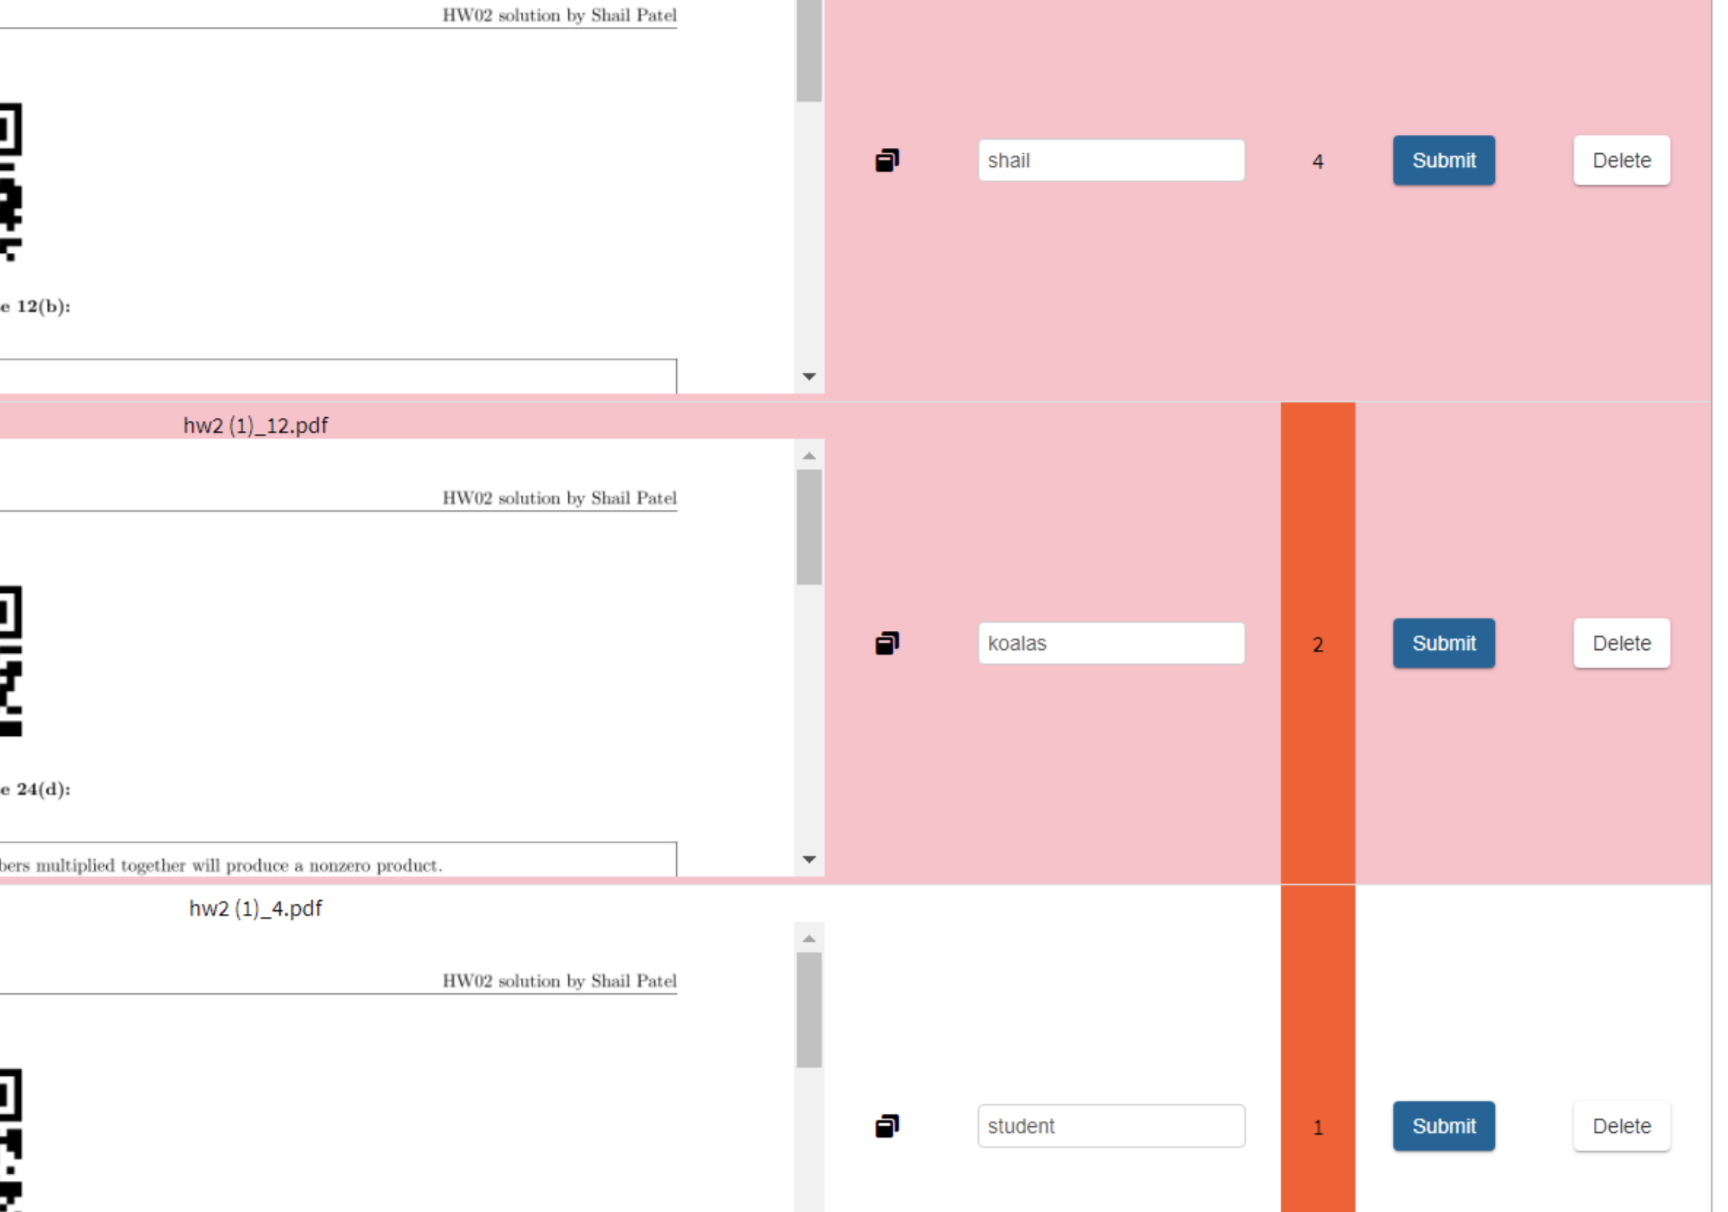
After processing, the student_id text area will be autofilled with
the string contained in the QR code along with a pagecount. Invalid
user ID’s will be highlighted in pink. Individual pdfs that do not
match the expected page count will be highlighted in red.
Page Redactions for Anonymized Grading
The instructor can specify the redaction of portions of one or more pages of each student’s PDF that contain their name or other personally identifying information. The original unredacted PDF is saved on the server, but Submitty also prepares .png images of each page of the PDF with the specified areas redacted (covered with a grey checkerboard pattern). When the grader is in blinded or anonymous mode, the redacted .png file will be displayed.
To enable page redactions, enter the “Edit Gradeable” menu, make sure you have enabled “Manual Grading”, then click on the “Rubric” panel, and click “yes” for “Are student submissions/uploads a single file PDF with a fixed/prescribed format?”
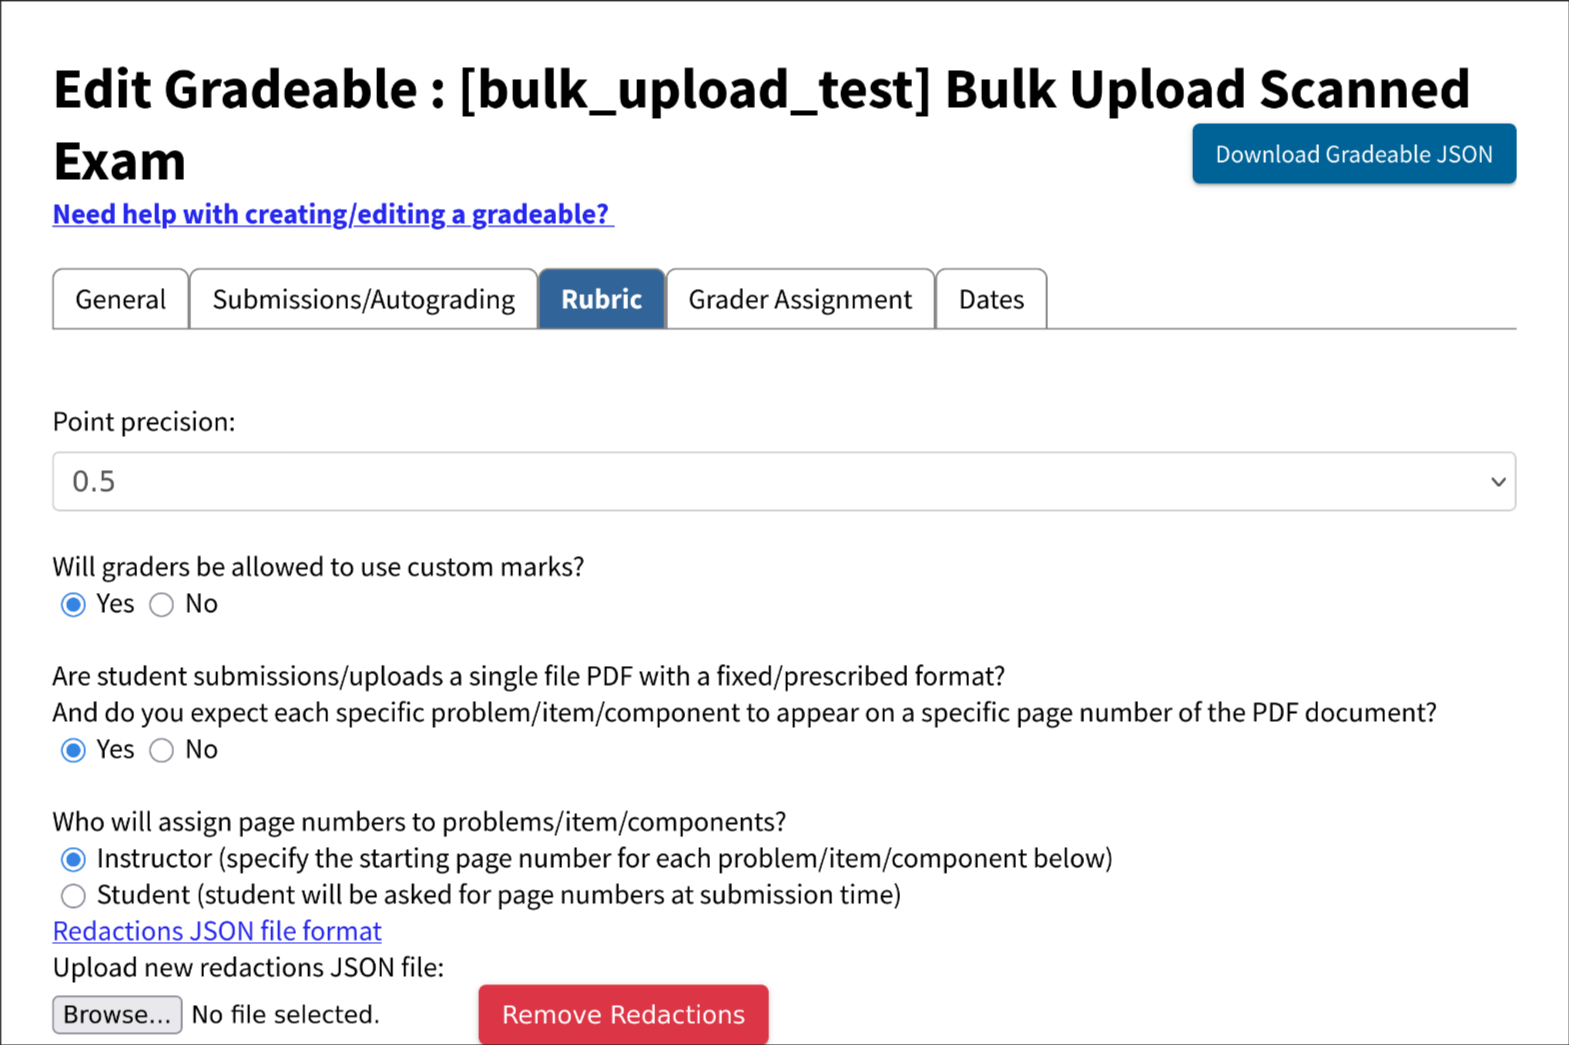
Here is a sample of the JSON format for the page redactions. This sample places a rectangle on the first and second pages of the document. The (x,y) coordinates specify the upper left and lower right corners of each rectangle, where (0,0) is the upper left and (1,1) is the lower right corner.
[
  {
    "page": 1,
    "x1": 0.25,
    "y1": 0.25,
    "x2": 0.75,
    "y2": 0.75
  },
  {
    "page": 2,
    "x1": 0.1,
    "y1": 0.1,
    "x2": 0.9,
    "y2": 0.9
  }
]
